Thursday, October 18, 2018

Compound or Traditional Bow?

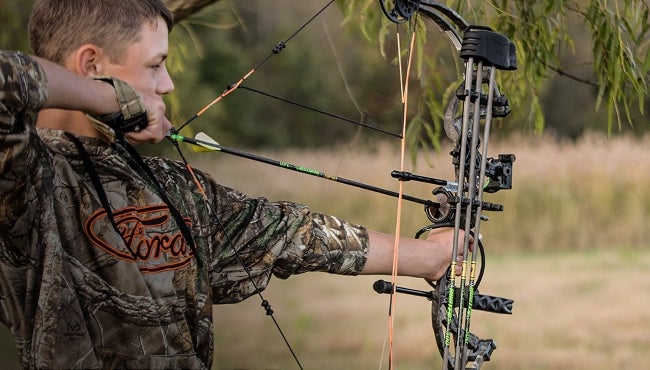
Best Bows For Hunting Recurve Compound - Guide Image

This choice is yours to make and it’s mostly up to what you prefer. While stick bows are fun they take a long time for most people to master proficient enough to reliably hunt with. Compounds are quick and relatively easy to learn and they’re hyper-accurate these days.
So, which one is right for you?
Stick with a compound bow if you don’t have a burning passion to learn to shoot a recurve or longbow. Compound bows are easier to hold back while you’re aiming, they’re easier to shoot good groupings with, and they can be highly customized to your situation.
Go for a traditional bow like a longbow or a recurve if you really want a challenge. If you’re like me and grew up dreaming about Lord of the Rings and slaying Orcs then a longbow may speak to you for entirely Romantic reasons. That said, make sure you shoot consistently enough to not wound your game.

Why Compound Bows Make a Good Choice

The best compound bows for beginners have several friendly characteristics to look for:
  • Widely adjustable draw weight that can increase as you improve
  • Simple to learn sights that provide high consistency
  • High let-off percentage so you can hold the bow back
Let me explain some of these in more detail so you can really understand what makes compounds so beginner-friendly.
Adjustable draw weight means that you can start out shooting a lightweight pull like 30 pounds. As you practice and gain strength you can increase that, say, to 50 pounds in gradual increments.
Simple sights aren’t necessary, but it’s easy to upgrade them later. As a beginner you’ve got enough to focus on without trying to dial in expert level sights. A consistent, simple bow sight is pretty cheap to get started, too!
Let-off percentage refers to how much of the bow’s draw weight “disappears” at full draw. Thanks to the advanced cams on modern bows the stress of holding the bow at full draw can be reduced by 80% or more. That means a 50 pound bow would feel like a 10 pound bow at full draw!
Don’t be fooled, though. Compound bows are fine tuned hunting bows for even the most expert hunters.

Compound Bow Hunting

Let’s talk about some of the advanced feature that make compound bows some of the best bows for deer hunting.
Releases are used to draw and fire the bow using precision mechanical devices. These take the load off your fingers and release the strong more evenly to create a better overall shot consistency.
Of course, you can shoot other bows with a mechanical release and some compound bow hunters shoot with their fingers. In general, though, a modern release with a good compound bow guarantees a much higher quality shot.
Advanced sights can be used to compensate for range, windage, and other factors. Compound bows are generally built with attachment points for precision sights such as the very fancy auto-ranging Garmin A1 digital sight.
Advanced sights can compensate for different distances or you can have more than one pin set to ensure accuracy from a wide variety of distances without the guesswork of a traditional bow.
Draw length can be adjusted on most compound bows to accommodate many hunters. Most people’s draw length will be between 26 -30 inches though yours may vary if you’re particularly tall (or short) or if you have unusually long (or short) arms.
Note: Traditional bows can generally be drawn to almost any length as well. The further you draw them, the more the draw weight will increase. Both compounds and traditional bows should not be overdrawn.

Considerations for Traditional Bows

Because stick bows like longbows and recurves are much different, let’s make sure you understand what you’re getting into should you choose to hunt with them.
With longbows in particular they’re very tall and can be hard to conceal and shoot from ground blinds.
If you should choose to hunt with a stick bow you may want to go with a lower draw weight than a compound bow. Stick bows are harder to draw and all the weight rests on your fingers. Once drawn the weight does not let off so you have a very short window of time to fire the arrow before fatigue sets in.
Good draw weights for a beginner might be as follows:
  • Female beginner: 30 pounds
  • Male beginner: 40 pounds
  • Female experienced (or athletic): 40-50 pounds
  • Male experienced (or athletic): 50-60 pounds
Now, I’m not saying people of any gender can’t draw more or less weight. You have to know yourself. If you come from a background of compound bow shooting you might be able to start with a bit more. If you know you’re a couch potato with bad hand-eye coordination you might want to start lower.
One major problem is that you can’t increase the draw weight like you can with a compound. You’ll have to buy a new bow altogether if you want to go from 30 pounds to 50 pounds.
That said traditional bows, unlike compounds, tend to retain their value very well over time. Compound bow technology is constantly changing and hunters are chasing the “new thing”. Whereas traditional bows have been more or less unchanged for hundreds of years.

What Type of Game Do You Hunt?

While you can certainly hunt just about any game with any type of bow, some make more sense than others. Which one you want to use is ultimately up to you.
Let me walk you through a couple examples to get your mind moving in the right direction and then we’ll let you loose on the bows!
Turkey hunters tend to use blinds to get the turkeys in close. Turkeys can startle easy so minimal movement is ideal. That’s why small form factor compound bows make the most sense because they take the least amount of movements and space to draw within the confines of a blind and your target on a turkey is quite small.
Whitetail hunters have a long history of hunting with traditional bows. Today it’s almost all done with compounds. From a treestand a compound bow makes the most sense because it’s difficult to draw a recurve from a seated position and nearly impossible to do so with a longbow.
If you’re hunting from the ground or stalking your prey longbows and recurves become much more viable and they’re fun to master.
Small game such as some birds and squirrel can be loads of fun to hunt with traditional bows! Using special arrows called “flu flu arrows” which are designed to only travel a short distance you can safely aim at targets on tree branches or flying targets.
Do not use a compound bow for this because they will launch your arrow a dangerous distance if you miss. On top of pretty much guaranteeing that you lose your arrow you could hit a human or valuable target in the distance.

Which Hand Do You Shoot With?

It’s worth noting that shooting bows means picking a hand with which to hold and draw the bow. Most bows cannot be switched from one hand to the other.
If you write with your right hand, you may be a right handed shooter. Or you may not. Bow shooting is based on dominant eye and not dominant hand so you need to double check.
To find out which eye is dominant use this test. Once you figure that out, you can order a bow to match. So, if you’re left eye dominant, you want a left handed bow. In that case you’d hold the bow with your right hand and draw the string with your left while aiming with your left eye.

FAQs

What else do I need to hunt once I buy my bow?

This is precisely why the #1 pick on our list comes with everything you need.
Once you get your bow you’ll want to tune it in for yourself. You can do this yourself if you’re skilled or you can take it to a local archery shop to get it done right!
Your bow must be tuned for the arrows you’re shooting which should be selected and cut to length for you based on your draw length and draw weight.
You’ll also need to pick out some broadheads for hunting which should, again, be selected based on your bow.
Then you’ve got to practice until you can drive tacks with your bow under pressure. If you miss you could wound the animal which may live crippled or perish days later where you cannot retrieve the harvest. Always practice ethical sportsmanship.

What is the best bow for whitetail hunting?

Honestly a good modern compound bow tuned for you is by far the best bow for whitetail hunters. That said, many choose to hunt whitetails with recurves or longbows as well!
The most important consideration is probably the distance you’ve set and practiced with your compound bow.
Use a multi-pin sight to set your bow for 15-20 yard shots at one pin. Another pin can be for 25-30 yard shots.
For beginners, shots at distances greater than 30 yards can be challenging and difficult to shoot consistently enough to reliably harvest an animal.

What is the best bow sight for hunting?

Similar to what we just spoke of, it’s hard to argue with an affordable multi-pin sight. They’re cheap, easy to set up, and reliable.
For those hunting from elevated stands you might consider a pendulum sight. These sights adjust themselves to the angle of a shot which helps compensate for minor changes in trajectory caused by shooting down from steep angles.
You can find a good pendulum sight at a pretty affordable price these days so honestly that might be the best choice for treestand hunters. Most of them only have a single pin, though, so you’ll have to learn to adapt!

Conclusion

At the end of the day the best bow for the money depends on your needs. The bows I focused on here are mid range models. Most bowhunters don’t need the nose-bleed prices of elite level bows, but if you fall in love with the sport then it might be worth an upgrade some day.
If you want to get out there and start hunting there’s a bow on our list that can get you there. I always recommend that you also take your bow to a local archery shop and have it tuned for you. They can also answer some of your questions about safe use and how to get started.
Remember that no matter which bow you choose, you should expect to spend at least a few weeks practicing on a target before you head out hunting.
Compound Bow Guide For Beginners

How to Choose the Perfect Archery Bow for You

Taking up the sport of archery is a bit like walking through a wardrobe and winding up in Narnia. You think you know what you are getting into, only to realize that there is so much more involved than you ever imagined.
Navigating the expansive world of archery can be a challenge. What style of archery do you want to take part in? Do you want to compete, hunt, or just have fun? Answering those questions can help lead you to the most important choice any archer can make: What type of bow will you use?
Table Of Contents
Recurve Bows
Basics
History
Modern Uses
Longbow
Basics
History
Modern Uses
Crossbows
Basics
History
Modern Uses
Compound Bows
Basics
History
Modern Uses

There are four types of bows for you to choose from

  • Recurve Bows
  • Longbows
  • Crossbows
  • Compound Bows
All of those bows have their own unique styles of shooting and are used for a variety of purposes. Learning more about each of them will help you decide which one is the best fit for you.

Recurve Bows

You have probably seen many recurve bows before without even realizing it. They are frequently used in movies and television shows because of their elegant form and traditional style. Katniss Everdeen shoots both recurve bows and longbows in the Hunger Games movies, while Hawkeye shows off his recurve bow in Avengers: Age of Ultron.
Recurve Bows

Basics

According to D.K. Lieu at the University of California, the chief benefit of the recurve bow is its ability to have a high energy content while maintaining a shorter length than longbows. This is due to the way in which the tips of the bow both curve away from the archer. That makes recurves more efficient and more portable than most other types of bows.
Modern recurve bows are generally made from layers of fiberglass or wood around a core made of carbon foam or wood. The diagram on this page by Discover Archery clearly labels the parts of a recurve bow, demonstrating how it all comes together to create the graceful style of the recurve.

History

The recurve bow is one of the oldest types of archery bows in the world. References to them date back all the way to the 8th century B.C.
Cascade Mounted Archery discusses how they were further refined by multiple groups of people in Central Asia who developed them to be used from horseback. The people of Mongolia, in particular, were renowned for their skills in horseback archery.
These historical composite recurve bows were made from bone and horn wrapped in leather. Some are still made in that style today to give them a traditional feel.
The recurve was a popular style of bow in many cultures. This is likely due to it requiring a lower draw weight for the same amount of power as a longbow. It was easier to use in a larger variety of situations thanks to its portability and maneuverability.

Modern Uses

While recurve bows can be used for many things, their highlight comes from their use in competitions.
In fact, when it comes to Olympic-level archery competition, the recurve bow is the only style allowed. If you want a little insight into what it takes to use a recurve bow like an Olympian, then check out the video below. Jake Kaminski, a silver medalist, takes you through the basics of choosing and using a recurve bow.
Of course, recurve bows can be used for more than elite competition. You can get one for target shooting as a hobby, or you can use one in more traditional styles of archery.
Specialized recurve bows, often referred to as “horse bows,” are used for mounted archery. That comes from the historical origin of composite recurve bows in Central Asia by horse-oriented cultures. Archers ride horses at a high rate of speed while shooting arrows at targets along their path.

Longbow

The longbow is similar to the recurve in that it is a popular style for traditional archery. It has strong historical connotations and so is often seen in movies that take place in medieval times. You can also see them in action in the upcoming Wonder Woman movie.
Longbows

Basics

A longbow is the simplest style of bow in its appearance. At its most basic, a longbow is as uncomplicated as a piece of wood attached to a string. That simplicity belies its strength.
The long bow curves gently toward the archer when it is strung. It basically forms the shape of the letter “D.” Because it lacks the beneficial curves of a recurve bow, or the technological benefits of a compound, it is arguably the most challenging type of bow to shoot with.
Modern longbows do not differ much from their historical counterparts. They can be crafted from a single piece of wood in a matter of hours, making them popular amongst amateur bowyers.

History

Historian Chris Trueman details the history of the longbow in medieval times. While it was used by multiple cultures throughout the Middle Ages, it was used with the greatest effect in medieval England.
The longbow was an integral part of English warfare during that time period. The skill of English archers with their longbows gave them a potent advantage over their enemies.
Those medieval longbows were primarily made of the wood from yew trees, but other types of wood were substituted during yew shortages.
Powerful longbows in medieval times were measured at an impressive six feet in height. They had heavy draw weights that necessitated extremely strong archers to wield them.

Modern Uses

Technological advancements have rendered the longbow outdated when it comes to warfare, but they are still very popular with archers of all skill levels.
Longbows are primarily used by fans of traditional archery as a hobby. They are also frequently seen in medieval reenactments. You can find clubs and organizations dedicated to the art of traditional archery all over the world.

Crossbows

Crossbows are different in appearance from other types of bows, but they function under the same basic principle. You might prefer a crossbow if you want to jump right into the sport of bow hunting without having to spend extensive amounts of time practicing. They are generally easier to learn with than other styles of archery.
Crossbows

Basics

The crossbow is unique amongst the bows for its horizontal form. It also shoots a different type of projectile that is generally referred to as a “bolt.” Bolts are shorter than your typical arrow but are otherwise similar in appearance.
Modern crossbows are made of fiberglass and carbon materials. More traditional styles can be crafted using wood or a composite of wood, bone, and sinew.
You can find modern crossbows in both recurve and compound forms, with the compound being the more popular style due to its greater efficiency. SA Sports has a handy diagram of both types of crossbow.

History

The origin of the crossbow dates back to ancient China and Central Asia. According to Ancient Origins, the crossbow is mentioned in The Art of War by Sun Tzu. That treatise was written in the 5th century B.C.
Crossbows did not cost much and were relatively simple for soldiers to use. Since it did not require much training to learn how to shoot a crossbow, they quickly became an integral part of ancient Chinese warfare.
Like the longbow, crossbows were also used in medieval times. In fact, the creation of the longbow is what pushed the crossbow out of frequent usage. While the crossbow was easier to wield, it also had a shorter range and slower shooting rate.

Modern Uses

The main use of crossbows today is hunting. They can be very accurate when used correctly and are able to shoot a rapid bolt at heavier draw weights. Modern crossbows have a much longer range than their ancient counterparts did.
You can also purchase a crossbow for target shooting if that is your preference. Target-shooting crossbows have lower draw weights than the ones intended for hunting. That is because much less force is required to penetrate targets.
Crossbows made for target shooting are on the small side in the family of bows. They are easy to transport and can be very fun to shoot with.

Compound Bows

The compound bow is the most commonly used type of bow for hunting. It is also the most modern and technological style of archery.
Compound Bows

Basics

Compound bows use a special pulley system that increases their power without increasing their draw weight. While the initial draw may be heavy, the pulley system enables the archer to hold the draw at a lower weight for an extended period of time. The point in the draw at which the weight decreases is known as the “let-off.”
These bows also differ from traditional types of bows in that they remain strung at all times. Recurves and longbows need to be unstrung whenever they are not being used or you risk damaging the bow. Compound bows do not share that problem, saving you a little extra time and effort.
Compound bows are more rigid than other bows. Their risers are usually made of aluminum or magnesium alloys, with aluminum being the most popular choice. The limbs of compound bows can be made of wood, fiberglass, or composites made with carbon fiber.
They use the same style of arrows as more traditional bows but differ slightly in the materials they are made of. While aluminum and carbon fiber arrows work in all types of bows, wooden arrows are generally too delicate for the power of compound bows. The majority of arrows used with compound bows are made of carbon fiber.

History

Compound bows are the most recent development in the history of archery. They have been around for less than a century. That makes them a true newcomer compared to the other bow types as they are all many centuries old.
According to Archery Report, the very first compound bow was invented by a man named Holless Wilbur Allen in the early 1960s. Allen was a mechanic who figured out how to attach pulleys to the ends of a bow in order to increase their power. He received a patent for his design in 1969 and the manufacturing of compound bows began.
While the basic idea of compound bows remains the same today as it was in the 1960s, there are continual advancements being made to increase their power and accuracy.

Modern Uses

Compound bows are ideal for hunting because of the incredible force they can impart on the arrows that they shoot out. Their unique pulley system makes this possible. It also makes aiming easier since the draw can be held longer, which is especially helpful in a hunting situation.
You can also use this bow for target practice. Many compound archers do both. They hunt during the appropriate season and spend the rest of the year at the archery range perfecting their shot.
The energy-efficiency of the compound bow makes it a popular choice for both beginner and advanced archers.
Archery is a thrilling sport regardless of the type of bow you choose, but your experience will vary greatly depending on your bow. It is important to think long and hard before you make the decision to purchase a specific kind of bow.

Conclusion

Archery is a thrilling sport regardless of the type of bow you choose, but your experience will vary greatly depending on your bow. It is important to think long and hard before you make the decision to purchase a specific kind of bow.
If you are having trouble making up your mind, then it is a good idea to take some classes at your local archery ranges. Most ranges will provide instruction in a variety of archery styles, including the use of both modern and traditional bows. This will give you a feel for the different types of bows and help you figure out which you are most compatible with.
Some ranges will also allow you to rent archery equipment. That is helpful if you need to spend a little more time practicing with a specific bow before you make your decision.
It is okay to change your mind after you pick your bow. Many archers enjoy a variety of bows and archery styles. With archery, you really can do it all.

How To Create Bow Rack

Today we have a guest post from Andy at Bow Hunting Maryland. As his site name implies, Andy’s an avid bow hunter here in Maryland. He’s also quite handy, and has helped Fred and Kim on several projects around their house, including installing hardwood floors last summer.
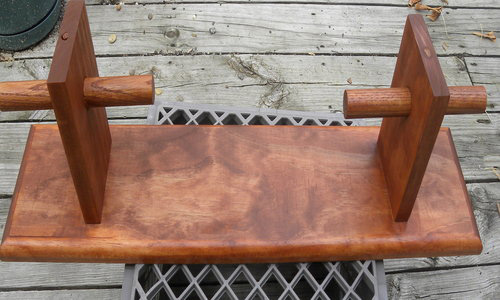
Andy asked if he could share an article on building the wood bow rack pictured below, and we obliged. If you’re interested in bow hunting in Maryland, or anywhere else on the planet, head on over to BHM and bookmark it for future reference.
How to Build a Bow Rack by Andy @ Bow Hunting Maryland
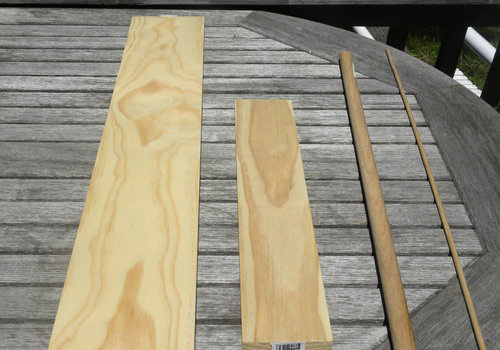
  1. 24 inches of 1 x 6 stain grade pine
  1. 12 inches of 1 x 4 stain grade pine
  1. 14 inches of 7/8 inch dowel oak
  1. 12 inches of 1/4 inch dowel oak
  1. 4- 1 5/8 inch drywall screws
  1. Mounting hardware – I suggest 4 screws straight into studs or wall anchors rated for 50lbs+
  1. Paint or Stain (optional)
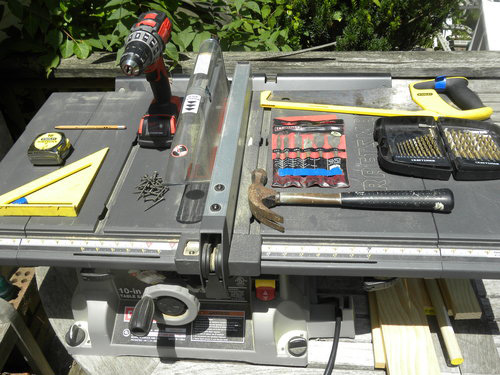
  1. Pencil
  1. Tape Measure
  1. Speed Square
  1. Hammer
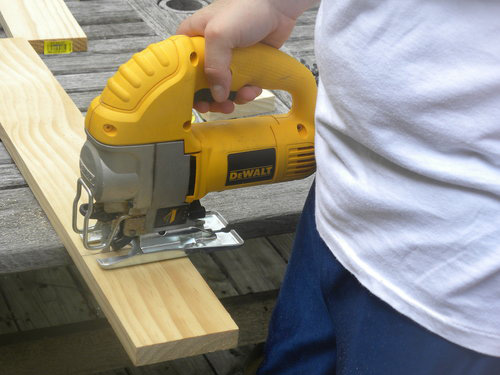
  1. Saw – I used a table saw and Jig saw, but a miter saw or a good old fashion hand saw works too
  1. Drill Driver
  1. 1/8 inch drill Bit
  1. 1/4 inch Drill Bit
  1. 7/8 inch Spade Drill Bit
  1. Router and router bit (optional)

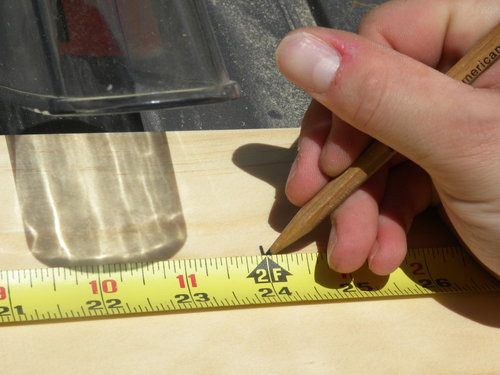
Step 1: Cut the 1×6 backer board at 24″
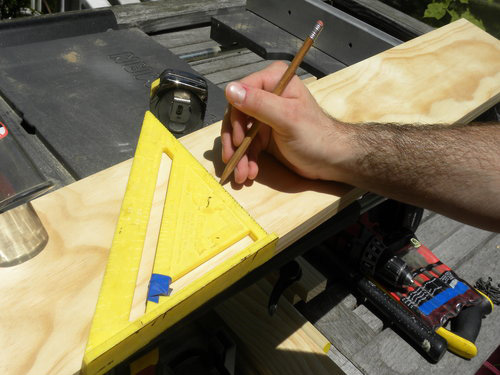
Step 2: Cut (2) 1×4 boards at 6″ long each.
Step 3: Mark the 1×4 with an X for drilling
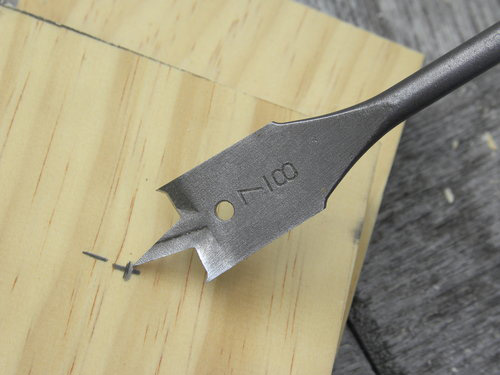
Step 4: Drill through the 1×4 with a 7/8″ spade bit.
Step 5: Add a creative edge to the backer board.
Step 6: Measure and mark the boards for drilling
Step 7: Measure, mark, and drill for mounting holes
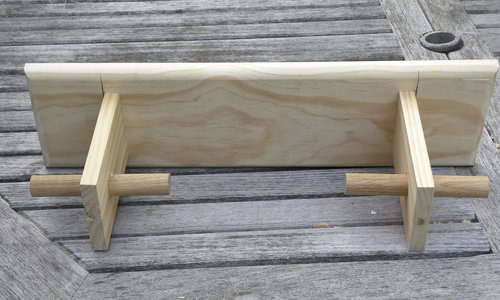
Step 8: Install Drywall screws through the backer board into the 1×4 components
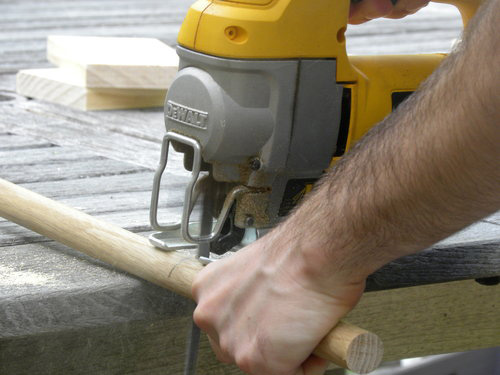
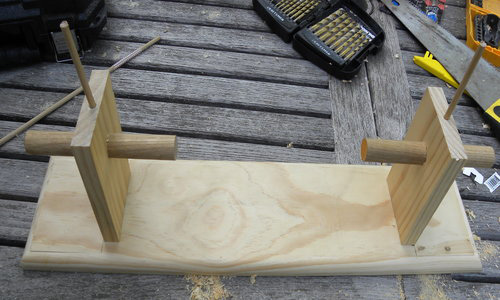
Step 9: Measure, mark, and cut the dowels.
Step 10: Insert the dowel.
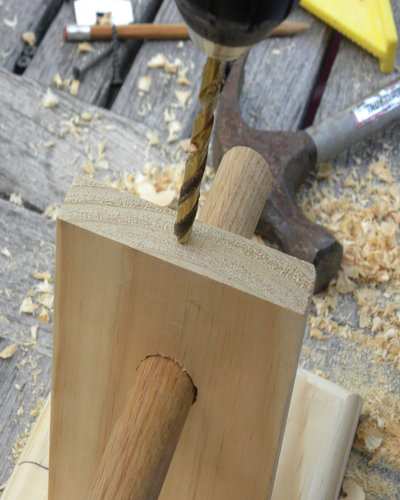
Step 11: Drill the center of the 1×4 for a locking pin n the dowel
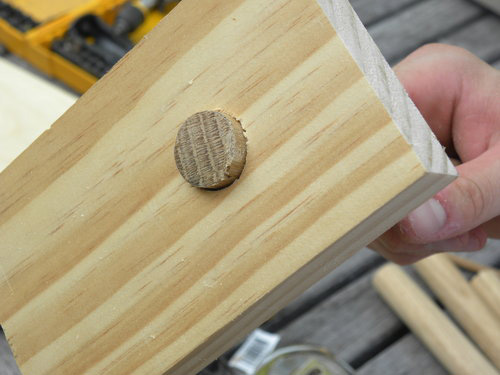
Step 12: Cut and insert the 1/4″ dowel locking pins
Step 13: Trim the 1/4 dowels flush.
Step 14: Sand the bow rack smooth
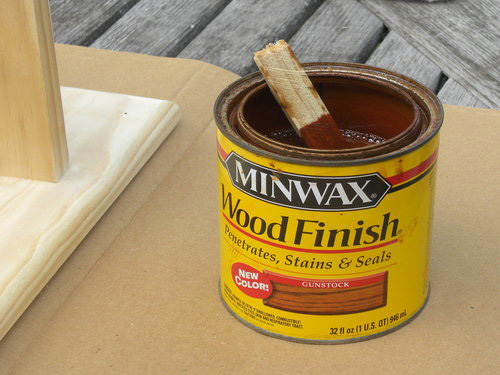
Step 15: Stain and seal the rack
Step 16: Mount the rack
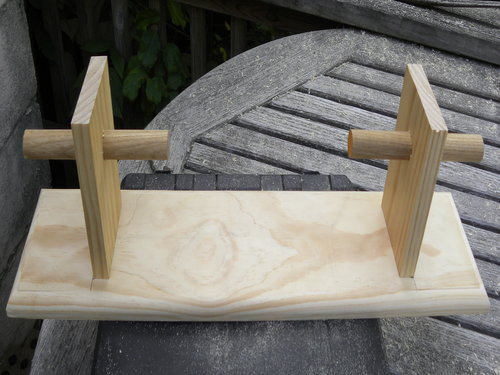
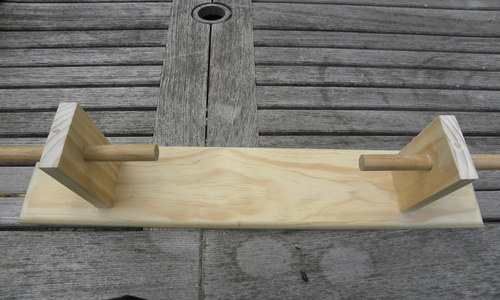
Building your own bow rack is an easy DIY project for any archery enthusiast. The materials that are needed will cost around $20 depending on your selection of wood, and everything you need can be found at the local home improvement warehouse. The whole project will take about an hour to build (excluding paint or stain) depending on design choice and skill level. The simple bow rack shown in this post is made to hold up to 4 bows.
First, the shopping list:
Tool List:
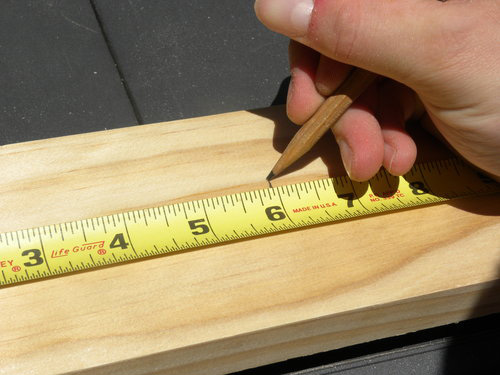
Measure from one end of the 1 x 4 that you just cut, 2″ in and 1 ¾” down and put an X where they meet.
Take the 7/8″ spade drill bit and center it on the X. Remember it is important that these holes are straight and level otherwise your rack will be lopsided, and nobody wants a lopsided bow rack.
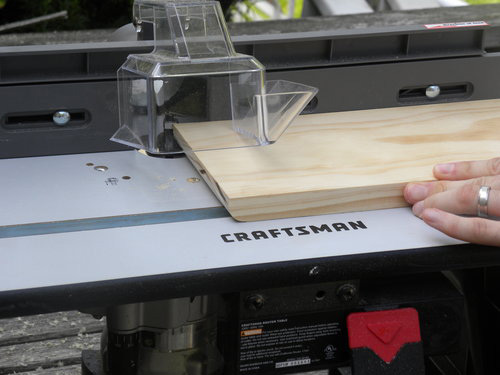
This is the design step. If you have a router and would like to put a creative edge on your backer board (1 x 6) now is the time to do it. I used a simple rounded edge bit to add some character. You can do anything you want with this step or leave it that way it is.
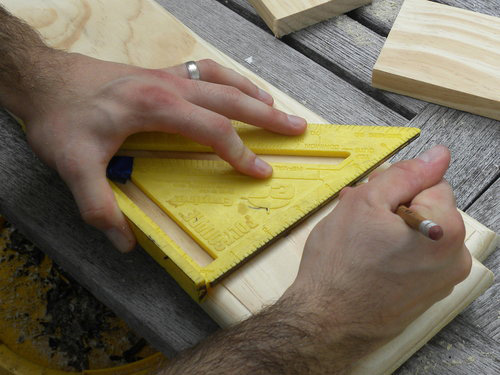
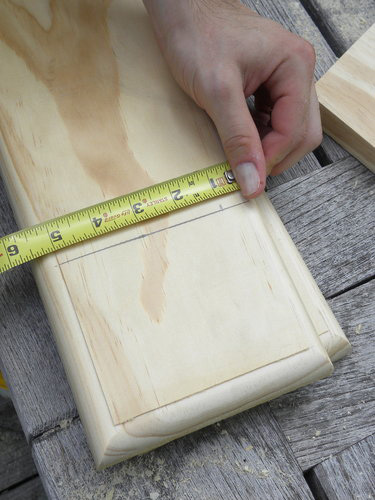
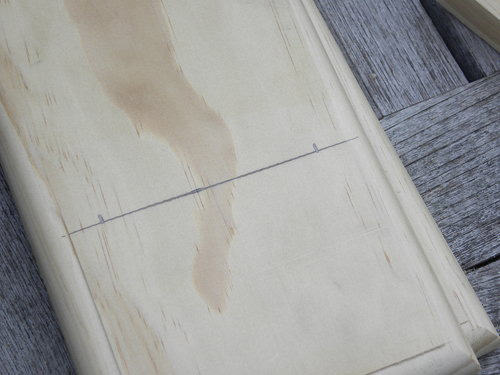
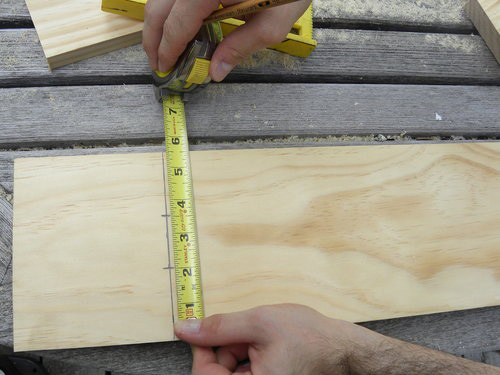
Measure in 4″ from each end of the 1 x 6 and draw a straight. Then, measure down 1″ from the top and up 1″ from the bottom making a mark on the lines you just drew. This gives you guidelines for mounting your 1×4 boards in the right places. This is important, otherwise the holes you drill in Step 7 will not line up correctly.
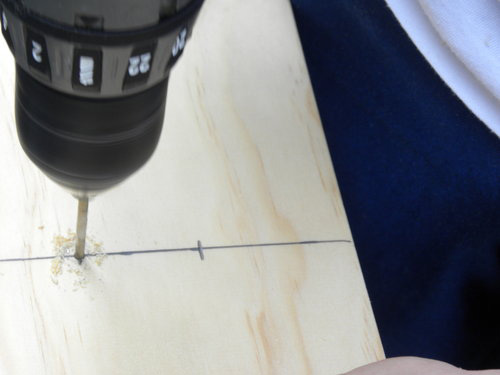
Flip over your backer board (1×6) and measure in towards the center 4 3/8″ from both ends and draw a straight line. Then, measure up 2″ and down 2″ along these lines and make marks. Take the 1/8″ drill bit and pre-drill each of these 4 marks that you just made. These give you pilot holes for mounting your 1×4 brackets.
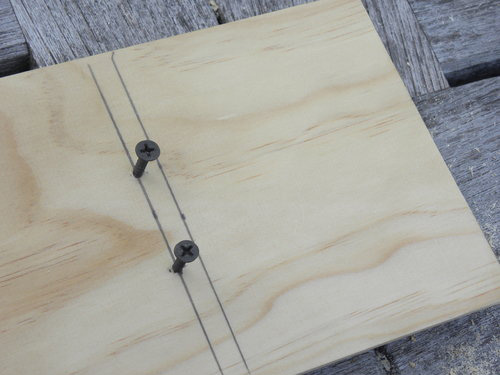
Take (4) 1 5/8″ drywall screws, start them from the back of the 1×6 into the 4 pre-drilled holes from Step 7. Then take your 1×4 brackets (one at a time) line them up to the guidelines you drew on the front of your 1×6. Screw one screw into the 1×4 and check to make sure you are still within your guidelines and screw the second screw in. You can either get someone to help you hold these in place while you screw them on, or use a clamp. Then repeat this for the second 1×4.
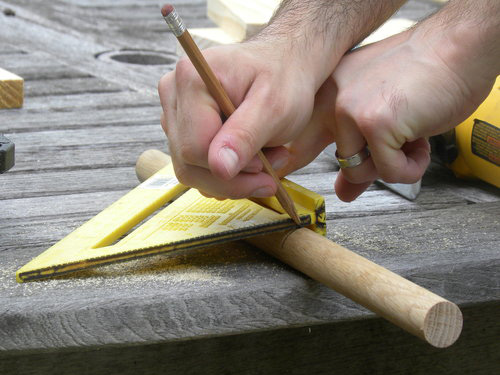
Measure 6 3/4″ on your 7/8″ dowel, mark and cut. You will need two of these.
Slide your 7/8″ dowel through the hole you drilled in step 4. It should stick out 3″ on each side. Once you have it centered, mark it on each side.
Place the rack flat and measure in 2″ from the end of the 1×4 on the top in the center (remember center is 3/8″ in from either side on any 1x wood). Take your 1/4″ drill bit on your mark and drill down through the 1×4 and 7/8″ dowel. This is probably the hardest step. It is very important to stay straight while drilling this hole as you want it in the center of the 1×4! Do this for both 1×4 brackets.
NOTE: Most 1/4″ Drill bits are long enough to just reach but make sure you verify before drilling.
Cut 2 pieces of your 1/4″ dowel to the depth of the holes you just drilled in step 11. Mine were 3″ long but it will vary depending on your drill bit length. An easy thing to do is to hold the dowel next to your drill bit and mark the length of the hole you just drilled, but better to be long than short. (I highly recommend using a hand saw for cutting the 1/4″ dowel)
Take your 1/4″ dowel pieces that you just cut and tap them into the holes you drilled in step 11. They should be flush with the top of the 1×4, if they are not, they may not be all the way in. Otherwise, if you happen to measure a little long then you can just take a hand saw and trim them so they are flat.
Sand your brand new bow rack smooth with a 220 grit sandpaper. You can use an electric sander or do it by hand. I sanded this one with one of the new sponge sanding blocks.
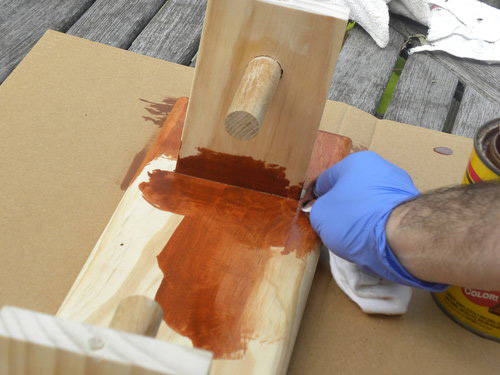
Then, you can paint or stain your bow rack to whatever color or design you wish. The one you see pictured below and was stained in the Minwax Gel Stain color Gun Stock and then it got a coat of satin finish polyurethane.
Finally, you can mount your bow rack on your wall just make sure your bow doesn’t hit the floor. I prefer to mount them straight to studs in the wall. Use 4 mounting screws of your choice but make sure they are 2″ long or longer and attack the bow rack to the wall.Wherever you have mounting screws that are not going into a stud, use wall anchors that will hold 50lbs or more!
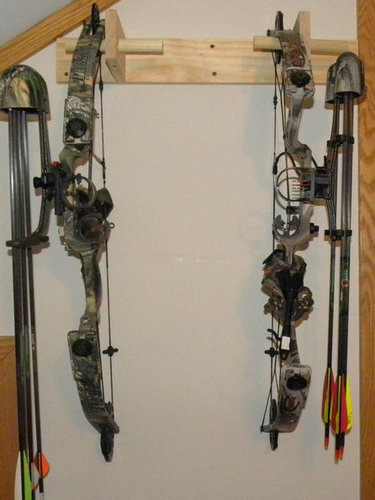
Here’s a picture of my current bow rack. I built it just like the one we put together, only faster and with scraps of wood I had laying around. It’s not as pretty, but I wanted to show you how it looks mounted to the wall.
Hopefully this makes for a fun, easy project for all of the archers out there and maybe even helps make a little more room in your house!